Thursday, August 4, 2011

Who loves a bargain?!

Before I continue, a note for my Aussie readers. Stop reading immediately and get thee to Spotlight!!

THE most ridiculous sales going on there at the moment. Can I share the bargains I picked up over the last weekend?

Fluffy White Bathmat $3.60


Perfect size for our petite bathroom!


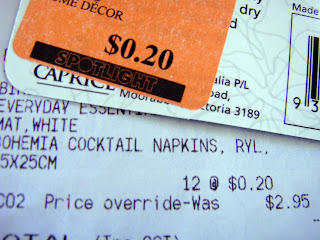
Cotton cocktail napkins 20c each.


How pretty are they? I bought a few in teal & white and blue & white. Originally marked at $2.95 EACH!


This roller blind window covering was 60% off! I seriously {heart} that! only $15.00.

 
What makes this even better is that I bought this one on a bit of a whim... I'm still toying with what to do with the blue powder room and thought I'd have a go at fitting this to the window - which is the good thing about roller blinds - you can cut them to size. I brought it home and I totally lucked out - it fit the window PERFECTLY - no cutting required. I was so excited, but being home alone at the time, I could only share my good fortune with the dog. She was quite obliging of my carrying-on really.... poor thing probably couldn't care less.


I also picked up some pretty fabrics for a few new throw pillows for the guest room - A gorgeous yellow stripey one and some slate grey, both 50% off. nice!


Finally, the piece de resistance of the whole shopping trip?


THIS!

I spent easily an hour walking around the upholstery fabrics, trying to redeem myself after the failed chair recover project of 2009. I saw this fabric immediately, but of course, ummmed & ahhhed about it too long and got confused. In the end, I just went back to the first one. At $12.00 a metre, it was going to be another expensive stuff up if it didn't work!

But wouldn't you know it, it rang up at the insane price of only $4.00 a metre! can-i-get-a 'HELL YEAH!!' 

Anywhoo - enough showing off! Hope my fellow spotlight'ers out there have managed to bag a few bargains too.


Amy

P.S. Spotlight didn't pay me to write this. I just love the joint so much I had to share.

Monday, August 1, 2011

Chair Cover Project - Take 2


So you've alread heard a little about my ongoing dining room chair saga here and here. Call me crazy, but I decided to give them another go.    

After an incredibly successful fabric shopping trip to Spotlight, I picked up some fantastic upholstery fabric - originally marked at $12.00 a metre, I was over the moon when it rang up at the register at only $4.00 a metre! Three metres for me then, thankyouverymuch!!  

When I got home, I couldn't help but get straight into making some new chair covers.

I love the texture of this fabric, it's surprisingly soft!

Call me extra crazy, but I didn't have a pattern for these and decided just to wing it. I'm a bit like that. It doesn't always go to plan I can assure you!

Firstly, I decided on what I was going to cut so I took measurements from all parts of the chair. Here is my very rough illustration of how I did it.


One long piece #1 (dotted lines are folds) and two of piece #2.


To keep things simple, I used only three pieces of fabric to assemble the chair. One super long piece, which incorporated the back, of the chair (a) the backrest of the chair (c) the chair seat (d) and the front of the chair (e). Then I cut two 'side' pieces, which were cut by measuring (d) and (e).

The width of the main piece was (b) which fortunately, was the same width the whole way around the chair. If definitely pays to take lots of measurements to make sure everything measures up or you'll have a chair cover thats too tight to fit or too big to sit neatly.  

I then added a small seam allowance to all the measurements and cut out my fabric. Before assembling the pieces, I hemmed the (b) ends of piece #1, as well as one (d) side of the #2 pieces


To assemble the slip cover, I  flipped the fabric so the wrong side was showing upward and then pinned down the sides of the chair, and then pinned on the #2 pieces on each side.


After that, It was just a simple straight stitch along where the pins were placed and I was done.
Sewing the along the (e) lines were a bit more tricky, but once I got the hang of it and trusted my pinning technique, it worked out really well.

A quick turn out the right way and the covers slipped straight on.

I'm so pleased with how they turned out. It took me about 30 mins for each chair and with only having to purchase the fabric, this whole project only cost me $12.00. Gotta love that!

Here's a before and after of the full table setting.


Before...


and after.


the first failed attempt
and the final finished product!


They look like new chairs!

Thanks for seeing my tutorial. I hope you enjoyed it as much as I did. It's been a really rewarding & quick project - particularly as I've been procrastinating on it for so long.

Amy


Linking up with: